3 Quick Tips to Making an Adobe Premiere Slideshow
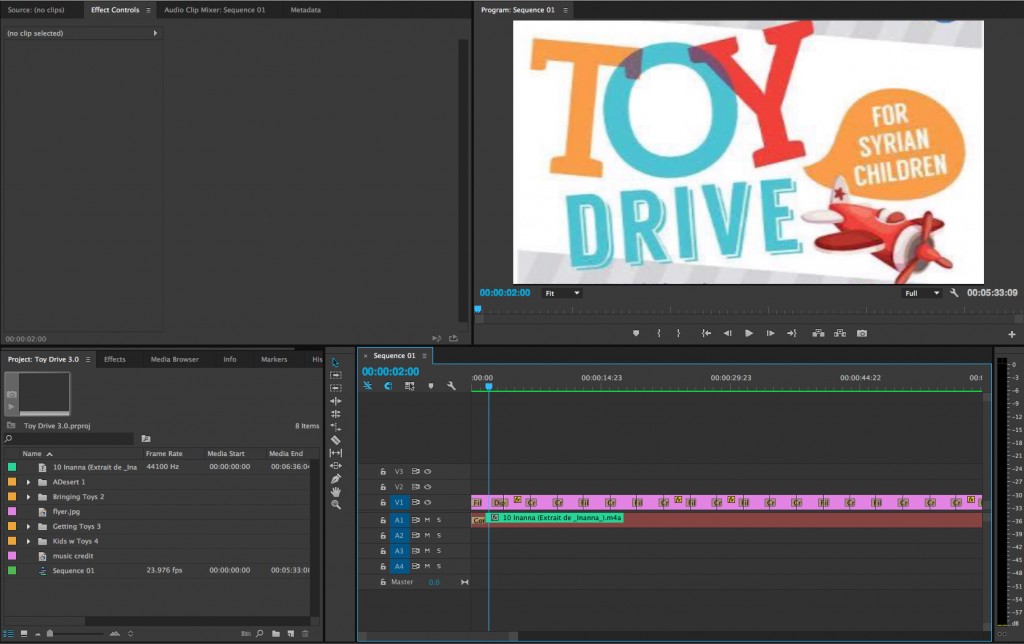
A few weeks ago I was tasked with a very important mission. Take a pile of photographs and compile them into a poignant and meaningful slideshow that would leave a lasting impression on anyone who watched it. We had recently helped organize a toy drive for children in Syrian refugee camps, and we had just received pictures of the toys arriving at the camps. The camera perfectly captured the raw emotion of highs and lows on the faces of hundreds of children. I knew the slideshow would have to seamlessly blend all the pictures together while telling a story of heartbreak and hope. Ordinarily my mind would have reeled. I was instantly calmed because I knew I could use Adobe Premiere to make the entire production.
For experts at Premiere, there are of course many ways to make your slideshow dynamic. But if you are new to the program, here are 3 easy tips on how to make an impactful slideshow using Adobe Premiere:
First, Add Your Pictures!
To start your slideshow, you will want to add photos to your project bin:
- To do so you can either, File –>Import or simply drag your photos into the project bin.
Add photos to timeline:
- Simply drag and drop in the order you would like. Each photo is set to a default 5 second length, but you can change this easily by using the trim tool (]) to shorten or lengthen the photo.
Then, Add Your Effects:
Once all desired photos are in the timeline you can add video effects to make them transition smoothly into each other:
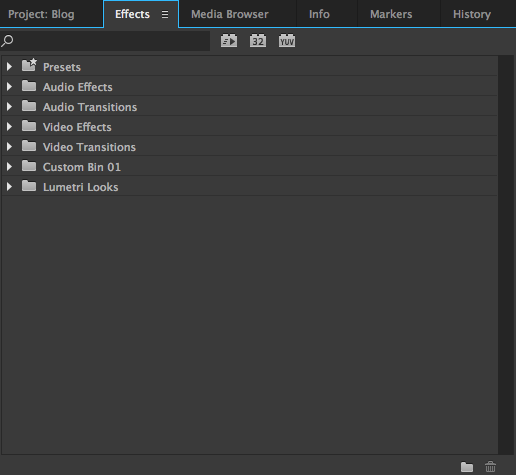
- Locate the ‘Effects’ tab right next to the ‘Projects’ tab in the left corner of your screen.
- The ‘Effects’ tab has 7 dropdown menus that you can choose from.
- For a simple but elegant transition effect, I suggest Video Transitions –>Dissolve–>Film Dissolve. This is a classic transitional effect and you really can’t go wrong with it!
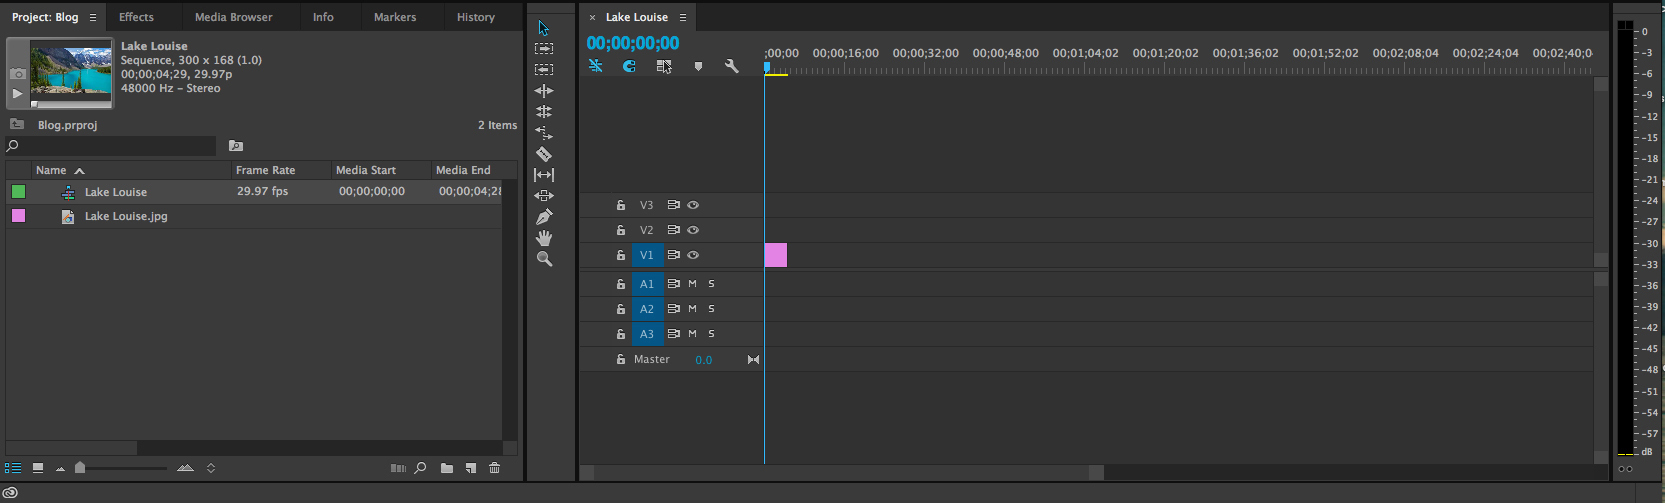
- To apply the effect to a photo simply click on the desired effect and drag it into your timeline right on top of the photo you wish to use it for.
And Definitely Add Music:
To really put the cherry on top of an emotionally charged slideshow you need to add some tunes! To import an audio file:
- Double click on the grey space in the project bin and that will open the import box where you can select audio clips from your computer.
- Once the audio clip is imported drag it to the timeline right under your photos.
- Make sure your music fades in and out effortlessly by using and audio effect.
- Click on the Audio Transitions dropdown menu –> Crossfade.
- Just like with the video transitions you can drag and drop the audio transitions on top of the audio clip in your timeline.
- Drop the audio transition at the beginning or end of your audio clip depending on if you are fading in our fading out.
There you have it, a simple breakdown of how to create a modest yet powerful picture slideshow. Remember, this is just the tip of the iceberg. Adobe Premiere has many tools and features that can take your slideshow to the next level. But hey, you can never go wrong with an uncomplicated and classy slideshow. Happy editing!
Please check out and share our full slideshow for the Syrian Toy Drive on Facebook, Twitter and LinkedIn.
Comments